Last Update: March 2024
Here is the working guide to forward multiple emails in Gmail at Once in 2024 using chrome extension on windows, mac and linux.
Ever since its inception, e-Mailing has been one of the most widely used elements on the Internet. It’s the main communication medium of millions of people and it’s not looking like it’ll go away soon, that’s why we need to learn how to use our email clients to the fullest so that we can do more in less time. So this forward multiple emails gmail feature is most useful and save your valuable time.
Email forwarding is one of those features that at first may seem complicated, but Gmail does it quite easily. If done incorrectly, the activity of forwarding multiple emails at once in Gmail will take a lot of time.
- How to Schedule an email in Gmail.
- How to enable extra Gmail features.
- How to Auto-forward incoming emails to another account in Gmail.
For that, we will need the help of the community, as they are just like you, people that had a problem to solve, just with a difference in programming skills. Today on Tech in Droid we’ll teach you how to forward multiple emails at once in Gmail.
How to forward multiple emails in Gmail at Once 2024
How do i forward multiple emails in gmail?
Well it’s a simple task; You are just a few steps away from start using forward multiple emails gmail feature by using chrome extension.
Step 1. Keep in mind that this process will only work with Google Chrome. Firstly, let’s download and install this extension.
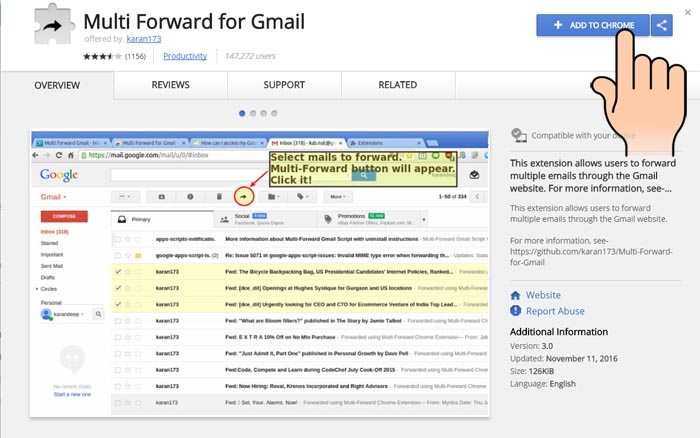
Step 2. Once that’s done, you’ll observe a right-oriented arrow on our extensions bar, let’s click this arrow to make sure the extension was properly installed. The next thing Open your gmail inbox now you will see a new right-oriented arrow (Forward symbol) that you need to click to authorize Multiple Forward For Gmail to use our account, let’s click it.
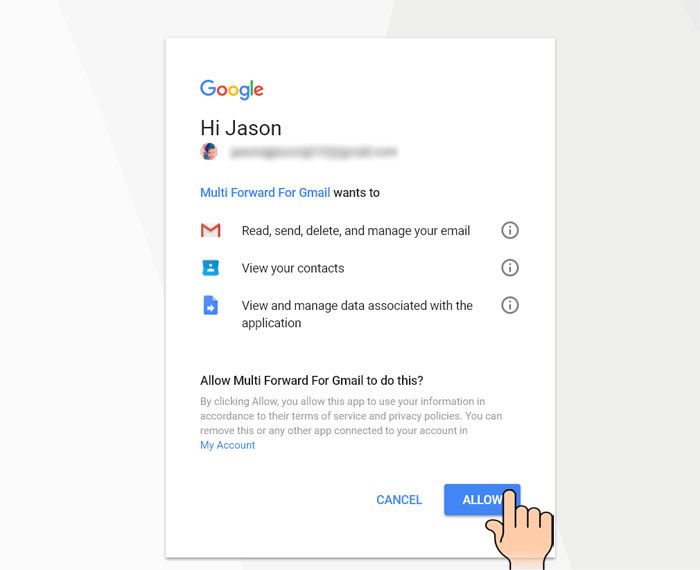
Step 3. At the next step you will have to sign-in with your gmail account, where Google tells us that Multiple Forward For Gmail is asking for a number of permissions, this is secure and the extension will not use your data in any malicious way. Click allow to move on with the process.
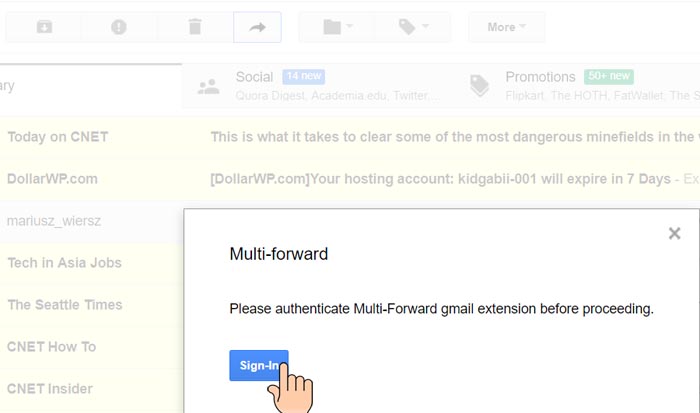
Step 4. Afterward, a small window will prompt you that says to authenticate multi-forward extension, Click on Sign-in.
Step 5. After this is done a message will appear on your screen, showing instructions on how to use the extension. Close this tab after you’ve read this, basically, the message says: “Thanks [email protected] for using the Multi-Forward Gmail email. You can now proceed to Gmail and continue forwarding your emails.”
Get Started Guide
- Go to Gmail, select the emails you intend to send.
- Click the Multi-Forward button
 on the Gmail website.
 - Authorize the extension if you have not done yet.
- Enter email recipients.
- Wait until forwarding is complete.
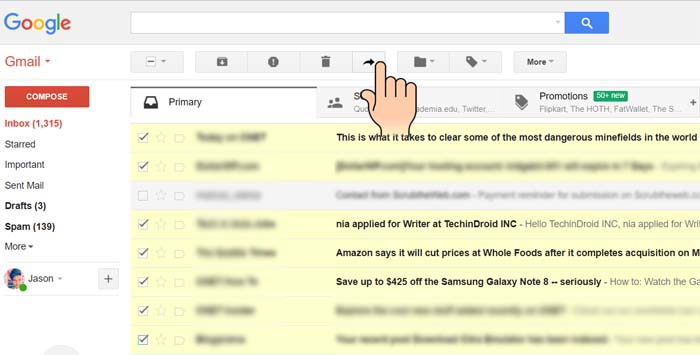
Step 6. Now let’s check if the extension worked or not. To do this let’s access our Gmail account, let’s click the white squares at the side of the emails we want to forward, clicking will check mark them. Once that’s done, let’s select the “Multi-Forward” button to start the shipping process.
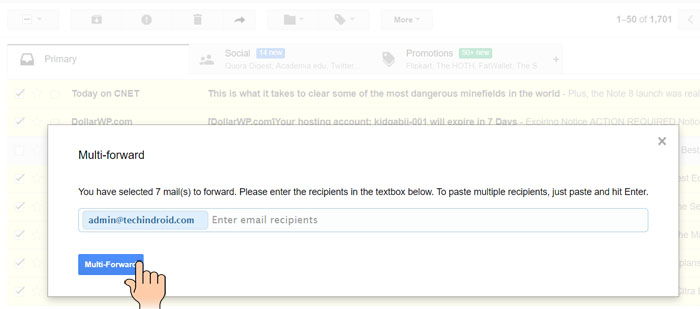
Step 7. The next thing we need to do is enter the email address of the recipients. We can enter multiple addresses, or just one, depending on the situation. Once that’s done, select “Multi-forward”
Step 8. This will open a popup which will advise us not to close it until the process it’s done, a wise man follows advice, so let’s wait.
Finally, a new window will prompt informing us that the process has been done successfully.
In this way, you will have made Gmail forward multiple emails at once forwarded to all the selected the sender or senders that have included. Did you have any problems with this extension? Let us know in the comment box below, and don’t be afraid to share this post with your friends if you found it helpful.


